
This guide will show your client how to log in and use the pictureadmin.com site.
Printed Version- You will receive an email with a link to your organizations images
- Or you may go directly to this site address: https://pictureadmin.com
- Enter your email and password that you created the first time you visited the site
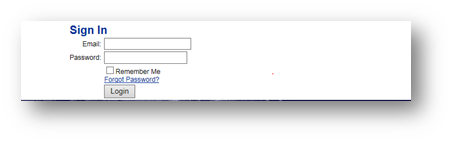
Image Selection Site User Guide
- Once logged in, you will see a list of organizations you are authorized to review
- Click on the appropriate organization name
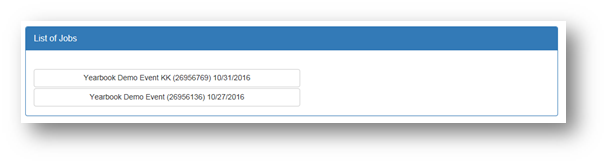
- Click on the appropriate organization name
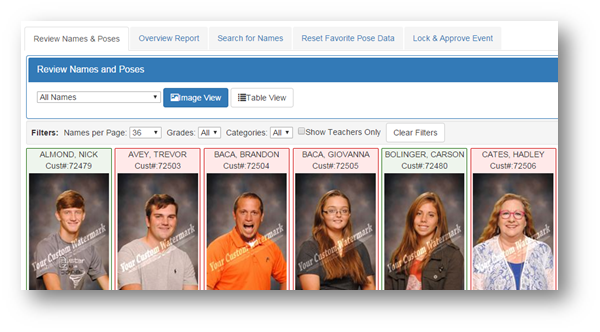
- User may choose to view data by Image View or Table View
- To view images and select poses click Image View
- To view a list of names click Table View

- Select what you want to view from the dropdown
- Options are: All Names
-
-
- Name with images
- Names without images
- Names removed
-
- Then select if you want Image View or Table View
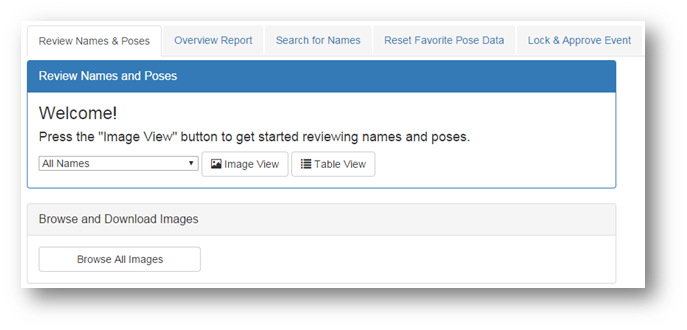
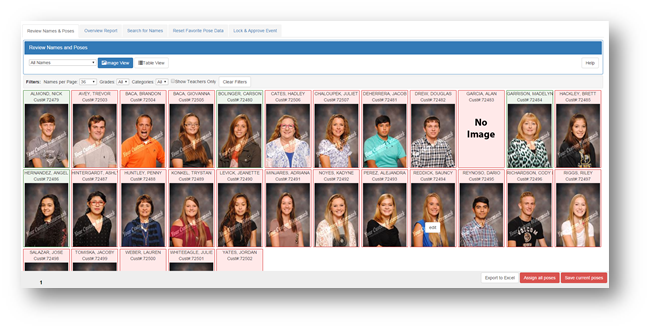
- Initially select All Names and then click Image View to review poses

- An image will already be selected for each subject
- Green outlined images represent images that have been approved
- Red outlined images represent images that have not been approved
- No image represents names subjects with no image assigned
- Under each image you will see where the pose was selected.
- Default means either the image was the last image taken by the photographer or the photographer specifically selected the image.
- End User: Means the student or parent has selected the image.
- Admin: Means someone on the pictureadmin site has selected the image.
- Note: The pictureadmin will override default and/or end user selections.
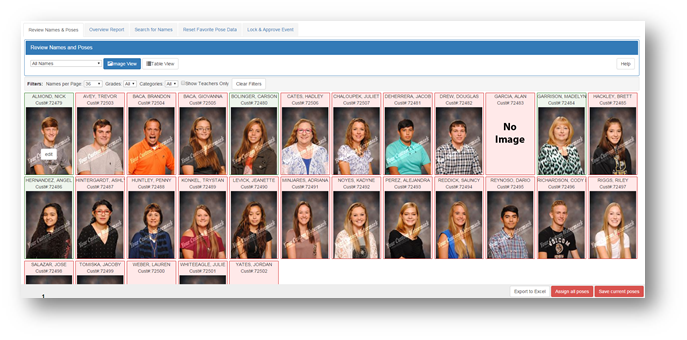
- Using the Filter
- You can filter down by Grade or Category
- You can elect to view only teacher
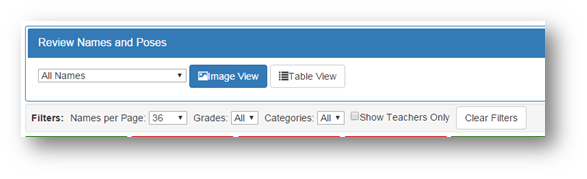
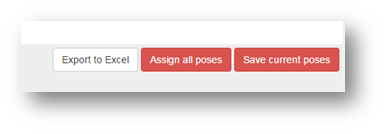
- You can Export image/name data to excel
- Click Export to Excel to download a printable report
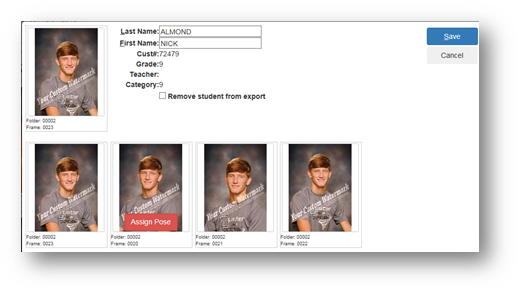
- To change the image selected for a subject, you can do so by hovering and clicking on the edit button that appears

- Hover over and click the Assign Pose button on the image you’d like to select
- You can edit the First & Last Name
- You can remove a subject from being included by checking “Remove student from export”
- After changes click Save
- If pose displaying is satisfactory, you do not have to go into each image. You can choose to only edit those that need to be changed. Once the image displayed on the main page is the image you want to use, you can click the Save Current Poses button and all images currently displayed will be set as the selection.
- If you’d like to bulk assign all subjects to their first image, you can do so by clicking the Assign All Poses button

- You can change the images you are viewing by selecting a different option from the dropdown
- View names with images
- View names without images

- Other Actions: Search for a name allows you to enter and pull up a specific subject
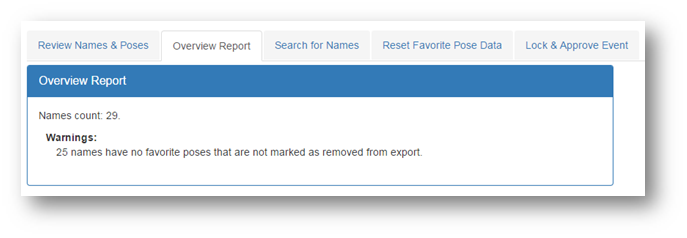
- Other Actions: Overview Report
- When all selections have been made you will click Lock and Approve Event
- You will be given a recap and the option to abort or confirm the lock

- Once locked you will no longer be able to make any changes
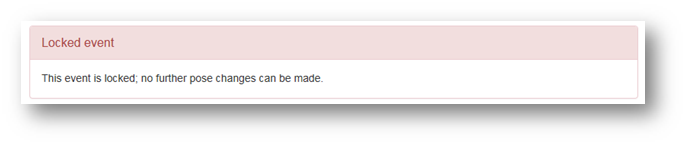
- Once locked, please notify your photographer that you have completed your selections.