
How to setup and manage a Senior portrait event in CORE, using Name Placeholder Registration to collect names & contact data and PhotoMatch to ID and upload images.
Scroll down for a step-by-step guide or click on one of the topics below to jump to that section of information
- Event Setup
- Offer Setup
- Creating Placeholder Names
- PhotoMatch Settings
- Event Settings
- Printing QR Name Cards
- At the Event
Event Setup
The following instructions will guide you through an event where you have not received a roster of seniors and contact data, so you plan to use registration to collect name and contact data PhotoMatch to upload, ID and post images online.
- Click on Events on the top menu in CORE.
- On the left menu select School or Grad market (Recommend Grad)
- This narrows down the workflows, features and products to that specific type of event
- Click “Create New Event”

- Select Your Acct #
- Select the market type: School or Grad
- Select your workflow (If you don't have a workflow, click here to learn how to import and setup a workflow)
- You will notice the add-on features are automatically selected or deselected based on your workflow settings.
- At this point you can select or deselect any add-ons
- Enter Your Event Name – Remember your customer will see this name, so we don’t recommend abbreviations. If you allow customer to search for events, the full name and year in the event name are helpful.
- Event Date: enter the date of the event
- Event Deadline: enter the deadline date that will appear on the website (people can still order after the deadline)
- Late Fee Date: enter the date you want to start charging a late fee. This date needs to be at minimum one date after your deadline date.
- Email Campaign will be preselected based on the settings in your Workflow, this can be changed after the event is setup if necessary
- Offer: will default the offer you set on the Workflow. You can change it here or after the event is setup. We recommend the CCS Senior or Grad Fair Offer.
- Zip Code: this is the zip code of the event location
- Click Continue to setup the event

- You will now be within the Event Details of the event you just created
- You will notice the add-on features are automatically selected or deselected based on your workflow settings.
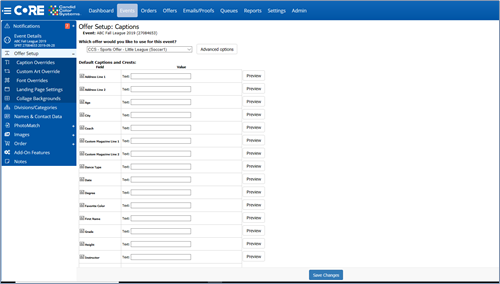
Offer Setup
Your “offer” is the set of products you are offering your customer. When you select your product offer for the event, you’ll also be prompted to enter any captions and logos you’d like used when producing those products.
- While in your event, click on Offer Setup on the left menu
- Here you will enter text/captions/logos for all prompts that will be the same for everyone photographed, such as, date or school name.
- Note: The prompts you see here are determined by the products you have in your product offering.
- If you are importing a roster, you’ll be able to import custom text/captions when you import your roster. If you are not importing a roster and doing a View First event, your customer will be prompted for these captions when they place an order.
- After entering captions and logos click Save Changes
- Here you will enter text/captions/logos for all prompts that will be the same for everyone photographed, such as, date or school name.
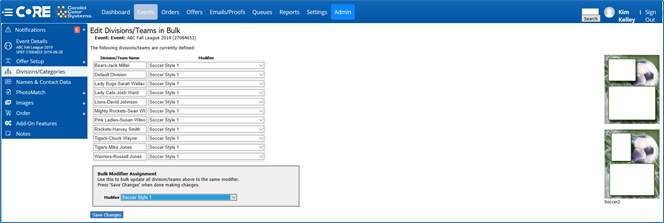
- Click on Divisions/Categories on the left menu
- You will see default division
- Click edit/add divisions
- Then click bulk update modifiers and select a modifier and save
- You will see default division
Note: modifiers are the “style” to be used on the products, such as, memory mates and trader cards. The modifiers available to select from are assigned on your products within your offer.
Note: depending on the products you are offering, you may not have any modifiers to choose
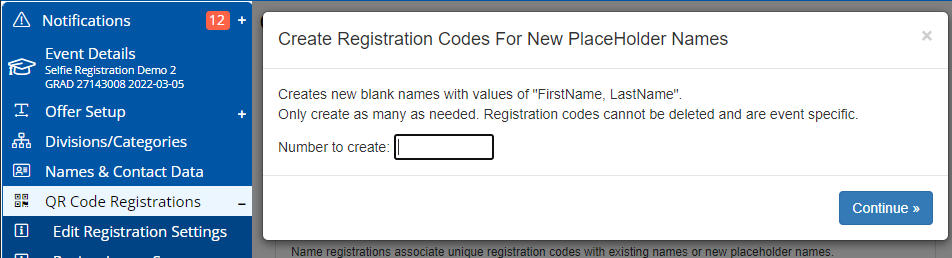
Creating Placeholder Name QR Registration Cards
- While in the event, click on QR Code Registrations on the left menu
- Click on the "Create QR Codes for New Placeholder Names"
- Enter the number of extra cards you'll like to create (recommend 5 per 100 names on the roster). These cards will be assigned to anyone that was not on the roster but shows up to be photographed. Once they scan the card and complete the online registration it will automatically update with their information in CORE.
- Once the placeholders have been created, click back on Names & Contact Data on the left menu
- Confirm you see the placeholders in your name list. They will be listed as LastName, FirstName in you list.
- Click on the registration code next to one of the names to go to the registration page to confirm the page is set as you expected
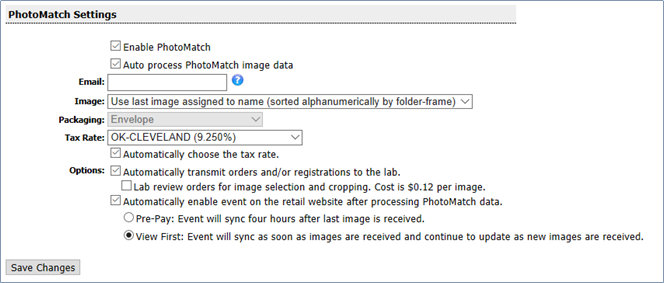
PhotoMatch Settings
Confirming your PhotoMatch settings are setup for your View First event.
- While in the event, click on PhotoMatch on the left menu
- Make the following PhotoMatch selections and Save Changes
- Make the following PhotoMatch selections and Save Changes
Event Settings
These settings can be controlled by your workflow. If you workflow is setup correctly for this type event, you can skip this step.
- Click on Event Details on the left menu
- Under Quick Links, click Event Settings

- Under Quick Links, click Event Settings
- Scroll down to Proof Card Settings
- Confirm your Email Campaign is selected
- Next to email campaign start date: Enter the event date
- Save Changes
- Click back on Event Details on the left menu

- Click the blue “Enable Event on Retail” button
- Wait for it to sync to retail

- Wait for it to sync to retail
- Click the “Enable Campaign Auto Queuing” button in the pink box

Printing the QR Registration Cards
Note: if you do not have a template created for your cards, you'll need to have support import a CCS card or you can create your own template. Either contact support to copy in our template or start here to learn how to create and edit your own card template.
- Go into your Event in CORE
- Select Order on the left menu > Queue Print Templates
- Select your device: (we recommend printing to PDF first, then send the PDF to the printer)
Note: If you don't see your device, make sure you have installed CORE print and activated your printer. Click here to learn how to install CORE print and activate printers. - Select your template:
- Sort Order: any order since using name placeholders
- Queue Profile: Sequence Cards
- Queue>>
- Open CORE Print and locate the print job
- Right click on the print job and to printer or pdf printer
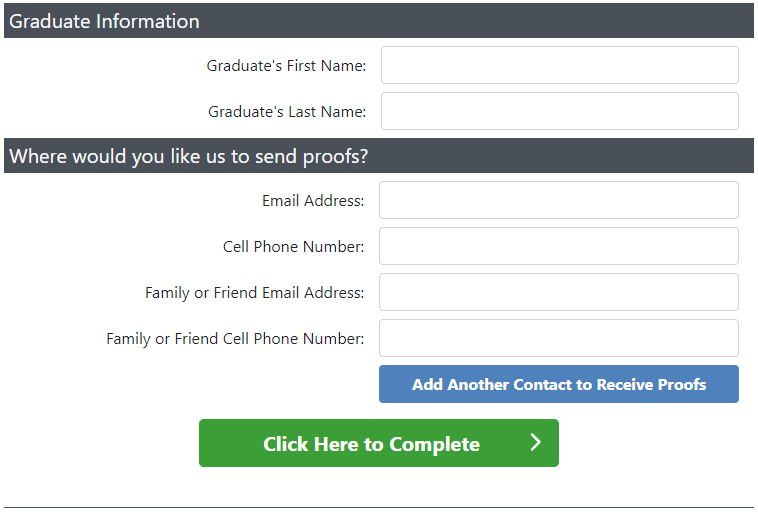
At the Event
As subjects arrive to be photographed, give a placeholder card and have them scan the QR and follow the link to the registration page. There they will fill out the online form to complete registration. Their name and contact data will automatically be updated in CORE. They can then proceed to the photographer. The photographer can pull them up by scanning their QR code to pull up their name.
- Log into the event on the PhotoMatch tablet
- Start the image upload
- Photographer will pull up the subjects name on the PhotoMatch tablet and take multiple poses
- When finished photographing this subject, close the window and select the next subjects name an take their photos
- Repeat for each subject
- Within 3-5 minutes your subjects will receive and email and/or text message